.jpg)
I spent a good couple of hours online at one site recently and I have to share. While my husband was busy talking on the phone, I was checking it out and then when he was finished talking, we decided to play Name That Tune. What does this have to do with events, do you ask? Or maybe you just want to know what on earth I'm rambling about.
While reading another wedding blog, I noticed a discussion about processional music. Everyone was saying how they are looking at using VSQ's 'Bittersweet Symphony' ... whaaaaa? I thought that was a song by The Verve? At first I didn't think too much of it because I was happy people are considering more alternative songs to use.
The VSQ thing kept bugging me though. Then I looked it up and found out what it stood for ... 
Vitamin String Quartet.
Possibly I've been living in a cave and that's why I hadn't heard about them. If you're like me and this is new, basically they put together high-quality recordings of popular songs ... instrumental style! I could go on and on describing the songs and how perfect they would be but listening for yourself is the better way to go (be forewarned ... it's addictive!).
Are you and/or your other half a big Coldplay fan? How about a bit of THIS?
This is a favourite of many but with the VSQ version, there's a new flavour to it ... LISTEN HERE.
Flare for something more *you*? How about some Guns N' Roses ... okay ... maybe for the recessional ;)
There are more traditional wedding tunes like THIS ONE and THIS PIANO ONE.
My two favourite ones are HERE and OVER HERE (excuse the You Tube).
I challenge you to find some songs that wouldn't mean something to you :)
June 30, 2008
Bittersweet Symphony
June 27, 2008
Stormy Weather

Depending where you were last night, you may have witnessed one of the most magnificent rainstorms (with some good old thunder and lightning). My husband and I had the 'pleasure' to be driving in it for about an hour ... a few times with zero visibility. Luckily it was a Thursday night but it got me to wondering if there were any pictures out there with events taking place in these storms.
I found the regular rain sprinklings shots but nothing like last night ... which is good ;) If any of you have some shots with wind or lightning or completely insane conditions, send them my way and I'll post them.
I think the storm chaser in me has arisen ;)
June 26, 2008
Mathematically Turning The Page
Found a handy little tool for any of you looking to figure out how big of a cake to buy for your event! Bakers, please feel free to disagree with any of the information as this is your specialty ... this seems like a pretty good guide to me though. Deciphering it can be a bit of a challenge so I've made it as reader-friendly as possible for you.
Above cake by cakegirls.
FOR ONE LAYER CAKES:
10-12 people = small oval or 6" round cake
10-15 people = 6" square cake
16-25 people = 8" round or 8" square cake
30-45 people = 10" round or 10" square cake
40-55 people = 1/4 sheet cake (9x13)
55-80 people = 1/3 sheet cake (11x15)
75-100 people = 1/2 sheet cake (12x18)
FOR ROUND TIER CAKES:
INCHES.......................FEEDS
4/6 ............................12-20
4/8 ............................20-25
6/8 ............................20-30
6/10 ..........................25-35
8/10 ..........................35-50
6/12 ..........................50-60
8/12 ..........................50-65
6/8/10 .......................55-65
6/8/12 .......................65-75
6/10/12 .....................85-95
6/10/14 .....................105-120
6/8/10/12 ..................105-125
8/12/14 .....................120-135
6/8/10/14 ..................135-150
8/12/16 .....................150-175
6/10/12/14 ................150-175
6/8/12/16 ..................175-195
6/8/10/12/14 .............180-200
6/10/12/16 ................200-220
6/8/10/12/16 .............220-240
6/8/10/12/14/16 .......280-300
FOR SQUARE TIER CAKES:
INCHES...................FEEDS
6/8 ........................28-40
6/10 ......................50-65
6/12 ......................70-85
8/12 ......................70-90
6/8/10 .................75-90
6/8/12 .................95-110
6/10/12 ...............115-135
6/10/14 ..............150-165
6/8/10/12 ..........145-160
8/12/14 ..............170-195
6/8/10/12/14 ......245-260
June 25, 2008
I Don't Care If Monday's Blue
I am in love.
It seems that because I'm married already, I'm finding a bunch of different things that would be awesome for things like proposals and marriages. Oh well. At least I have a business in the correct industry, right?
The object of today's affection? Something totally frivolous yet yummy. 
These are a wonderful paper creations you can let your imagination fly with. The Eiffel Tower creation opens like so ...
Perfect for a proposal!
But in case you're like me and don't have anyone about to pop any questions, it can also be used as a favour box for a wedding, shower or other special occasion. Here are some other great designs ...


The designer in question for these fun products is Denise Sharp from Studio d. Sharp. Her site is filled with other fun things like cake toppers, crowns and tiaras ... check it out!
June 24, 2008
Wood I Be Your Girl ...

Still being on my mission to inform others and educate myself about anything eco-friendly we can do I was looking at rings today. One site that popped out to me has a bit of special meaning ...
Loving trees, forests and all things nature, these pieces of jewelry by Gustav at Simply Wood Rings actually gave me chills. Perhaps I first got all emotional when reading the description of his artistry ... here it is in his own words ...
"Most of my wooden wedding rings are made of salvaged lumber; some simply found.
Much of the lumber used is sourced from other crafts people. Lumber such as that from the elegant neck of a violin that had its beginnings filling orchestra halls with sounds that soothed the human soul, or the wood from the baseball bat of a mothers' young son.
All the material used to make these rings had a previous noble life before their transformation to a new life of beauty.
I handcraft every ring to bring out the warmth and honesty of the wood. I endeavor to maintain the original spirit of any wood that offers itself to evolve into something new such as a wedding ring, anniversary ring or just simply a celebration of nature ring."
Again, check out the site and consider a little something extra for the environment :)
Cheers,
S
June 23, 2008
Like Spinning Plates
Another successful weekend was had at the Moments That Shine camp. The weather was beautiful and a glorious time was had by all. Details will come soon ... in the meantime, check out this great website ... Jessica Rust Designs.
If you're looking for a unique wedding/engagement/anniversary gift for someone (or even if you want to splurge for yourself!) she has some great artwork set to the dinner table! 


Jessica also has some limited edition gems, silhouette plates and other special occasion gifts ... check it out!
June 20, 2008
I Walk The Block & Window Shop
Anyone else an etsy addict? Each time I look at the website I'm amazed at the quality of artists and how out-of-this-world their fare is. Just by looking at the 'Wedding' section, you can find everything from gifts for your bridal party to garters to cake toppers.
Here is a collection of some of my favourite finds just from today ...
Whether you're getting married during the hot months or you have a flare for the dramatic, I don't know many women that could pass up a show-stopping fan like this by RoyalJewelz!
ArtfulBeginnings does these to-dye-for handerkerchiefs ... with whatever quote, monogram, wording you would like.
Perfect with that wedding dress! Contact stonesandstarling.
Wonderful for kids at the wedding ... can you imagine the colourful photos?! ribbonwands can hook you up with these ... well ... ribbon wands!
I'm a sucker for branding your event. If you have invitations, programs, menu cards, place cards AND a seating chart, wouldn't it be great if everything had the same picture or monogram? These stamps by officialinitial are an inexpensive and trendy way to achieve just that.
And I'm saving my two favourite finds until last. First up ...
This is sweet sweet sweet! Tired of the regular white ring pillow? I wish I had seen this when I was getting married because it would have fit in with things so well. Perhaps bstudio can help you out though!
And this is such a wonderful way to be chic, eco-friendly and frugal all at once ...
Autumn is my favourite season and I hope I get to see a groom sporting something like this in a few months :) tinarie21 is the artist here.
If you have some favourite finds, please share them!!!
Happy Almost Summer,
Susan
June 17, 2008
Come My Love, I'll Tell You A Tale ...

Wow. Where does one begin? I do believe BloggerBride & Groom successfully managed to have the most picturesque wedding one could hope for. All of their details came together, all of their guests arrived safely, everyone looked beautiful and the skies even opened up in time for their ceremony ... perfect timing!
My photos didn't turn out that great and in essence are a stepping stone to the better ones we'll be seeing soon ... but in the meantime, enjoy a glimpse into the fairytale day ...
The bouquets for the bride and her five closest friends waiting to be unpacked.
Each bridal party member's dress was clover in colour but had a great embellishment unique to the wearer. This bridesmaid chose a cream sash.
The altar arrangements before going out to the chapel.
Detailing on the bride's dress.
Waiting for the processional to begin ...
Vows at last.
Blogger Bride & Groom ... perfect models.
A close-up of the bridal bouquet ... pink peonies and roses with a green collar.
And a close-up of the AMAZING shoes she wore.
The reception before ...
And after.

The centrepieces were wine decanters (filled with elegant orchids and bear grass) and four wine glasses. Classy and useful!
Because they wanted the guests to stay and enjoy the party, BB&G hired a school bus to take people from the hotel to the venue and back.
The chapel at night.
More in depth details and photos will go up on the main site as soon as we've sifted through the very best of the photos. For now, I hope you've enjoyed this brief glimpse into one of the most perfect days a couple could ask for.
Cheers,
Susan
June 15, 2008
You Can Keep Your Hat On
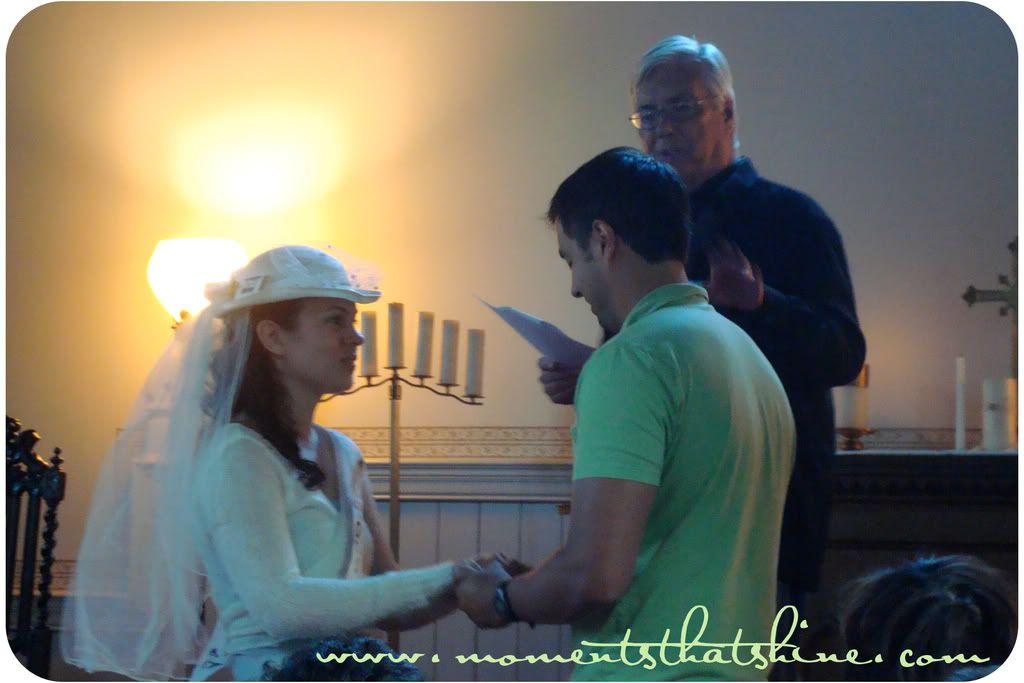
Before I post some pictures of the utterly perfect wedding of our very own Blogger Bride, I wanted to share a couple from the rehearsal ...
A few nights ago, here she is in her very sophisticated bride-to-be hat and sash ... lovingly made by her Matron of Honour. What a blast!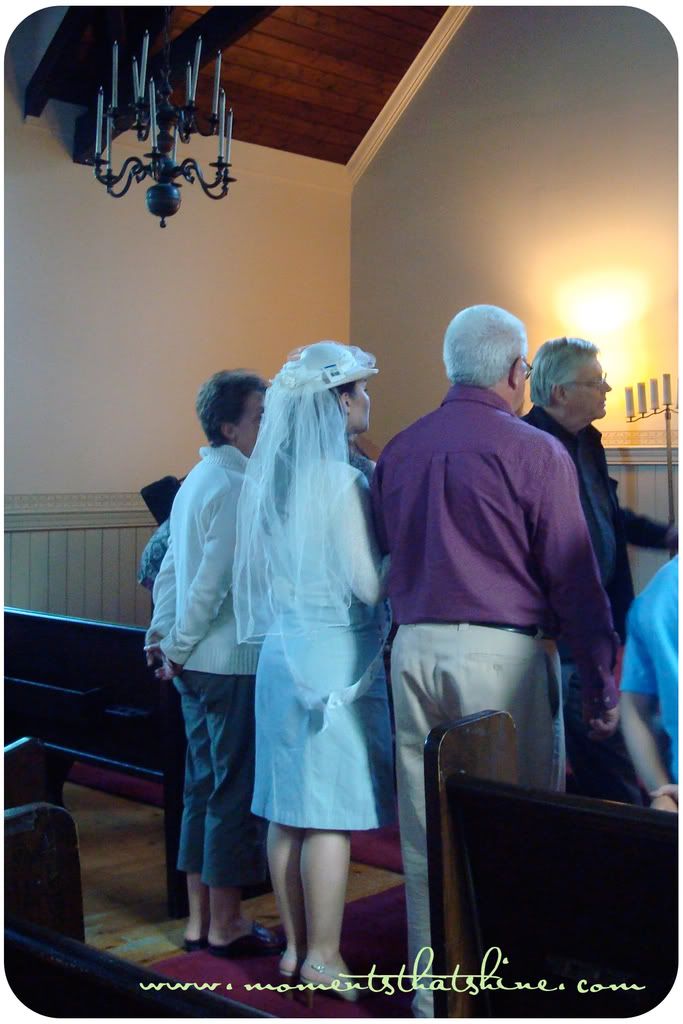
June 14, 2008
Ooh Darling Cause You'll Always Be My Baby

GARGANTUAN Congratulations to Meagan and Mike who I just found out are expecting in the fall! After coordinating their wedding and the invitations in October 2007, I quickly learned how eager Meagan was to have many little ones running around. I couldn't be happier for the both of them!
June 13, 2008
Hiding From the Sun

As I sit a home on a Friday night awaiting a storm to pass, I can't help but think of all of the brides who are getting married tomorrow. Please don't despair! This monstrous thunder and lightening will actually be good for your day ... frizzy hair may not happen!
Of course one of the brides in question is our very own BloggerBride. I cannot wait for all of her details to be revealed to BloggerGroom, their guests and everyone else who has followed along. BG's family has been to wedding after wedding whereas this will be one of the few BB's family has seen. It's sure to be a day of unique moments in everyone's lives.
Especially if these flashes of light don't go away ...
June 10, 2008
Dandelions in Bullet Holes
I found this fantastic do-it-yourself project that I thought would be fun to share. Instead of renting pew bows why not make things more personal and unique? These tin can vases are great for hanging on the ends of pews for the ceremony and they can then be transported into the reception area as extra decor ... or if you feel extra adventuresome, they can be used later as centrepieces!
What You Will Need:
Fabric
Lace Trim
5mm-wide satin ribbon
1m of 35mm-wide satin ribbon
Clean, empty tin can
Hot water
Scissors
Material
Ruler
Measuring Tape
Pencil
Scrap sheet of paper
Iron and ironing board
Towel
Hammer
Awl
Freezer
Double-sided adhesive tape
1. Soak the tin can in enough hot water to cover it completely. Remove the label, fill the can with tap water and place in the freezer until a firm block of ice has formed; this provides the necessary stability for step 2.
2. Remove the can from the freezer and place on its side on a folded towel. Using a hammer and awl, punch a hole just under the top rim of the can. Repeat to create a second hole opposite the first. Allow the ice to melt, empty the can and dry it thoroughly (see image A). 
3. Cut a 1m length of 35mm-wide satin ribbon for the handle. Thread one end of the ribbon through a punched hole, from the outside to the inside, and tie a large knot. Push the other end of the ribbon through the opposite punched hole and tie a large knot as before. Tip: Tying the knot on the inside of the can creates a neat finish (see image B).
4.Measure the height and circumference of the can using a measuring tape and record on a sheet of paper. Measure a section of fabric 30mm longer than the circumference and 30mm wider than the height of the can.
5. Fold a 15mm hem along each long edge of the fabric. Iron the fold to create a crisp edge. Then, fold a hem at 20mm from one end of the fabric and press.
6. With the wrong side facing up, place a strip of double-sided adhesive tape along each edge of the fabric. At the unhemmed end of the fabric, remove the backing paper from the tape (see image C).
7. Place the can on its side and adhere the end of the fabric to the can. Align the edges of the fabric with the rims of the can to ensure the fabric is straight. Remove the backing paper from the remaining double-sided tape and carefully wrap the fabric around the can (see image D).
8. Pull the fabric taut, overlapping the ends of the fabric. Secure in place by pressing firmly and smoothing down along the double-sided tape (see image E).
9. Measure and cut a length of lace trim 10mm longer than the circumference of the can. With the reverse side of the lace facing you, place a strip of double-sided tape along each end of the lace. At one end of the trim, remove the backing paper from the tape (see image F).
10. Position the can so that the seam of the fabric faces you. Align the end of the lace with the seam and secure in place. Remove the remaining backing tape and, with slight tension, wrap the lace around the can until the two ends meet. Secure in place by pressing firmly and smoothing down along the double-sided tape (see image G).
11. Wrap a length of 5mm satin ribbon around the lace and finish at the front with a knot or bow (see image H).
Project courtesy Creative Weddings magazine


